I've spent a lot of time figuring out how to DIY sewn wigs. There are some videos and resources that have been helpful to me, but I've had to piece things together from various bits and pieces to get a result I'd like. I figured that perhaps sharing my process might be helpful like that, as well.
I don't think I'm skilled or researched enough to call this a "tutorial" - rather take it as a walkthrough of my method.
The Tools and Materials
- Synthetic heat resistant doll hair wefts. I've bought mine from Yale BJD wig and Mattel Wig on Taobao, but they can also easily be found on Aliexpress. For a 8-9 inch head, I used a bit less than 2, for a 6-7 inch head I usually only need 1 or 1+ a couple cm extra.
- Stretchy netty material for the wig cap. I used tulle, but other thin and stretchy synthetic materials also work. Avoid everything that might shrink with heat.
- 5mm elastic (best if matching the wig's colour)
- Thread (matching the wig colour)
- cling film
- Needle
- Scissors
- Toothbrush/hairbrush + comb (long-tailed comb is a great help when styling)
- Heat tools for hair (9mm curler, small hair straightener, or a the very least a clothes iron)
- kettle/a way to boil water
- something water and heat proof to put the wig on during the boil wash - a wig stand of some sort or a bottle works well
- towel
- optional: hair clips
- your doll to work the wig on
The Wig Cap
There are many ways to make one, but I haven't been making them from scratch myself so I can't really step-by-step this... I've been using the Faux Fur Wig pattern from Undead Threads, adding some extra sewing allowance if needed and an elastic channel.
An important bit would be to: a) make sure it's a bit loose, at least at the very top and b)not have the elastic go all the way around the head because it'll show from underneath the fringe.


Sewing in the Wefts
The long hair weft's ends will most likely need snipping off the excess seam/thread first. You'll then be left with this:

Problem is, it'll fray/shed if left like that: thread your needle and "seal" the hair with a couple of horizontal stitches so you don't end up losing hair every time you brush the wig.
You can then start sewing the wefts to the wig cap! Make sure to leave the knot of the thread to the wrong side/inside the cap so it stays fixed and doesn't accidentally unravel when brushing the wig. To make the wig easier to put on, I'd recommend sewing the first row of hair to the elastic.

It's important to sew quite loosely. If you tighten the stitches too much, the wig cap will simply not fit the intended head size any more by the time you've covered the whole wig cap with hair. Go slow and give a reasonable amount of slack so everything stays flexi.

When running out of thread, get to the wrong side of the wig and tie the thread securely to finish it off. The more diligent you are with this, the less trouble you'll end up having when maintaining the wig.

Continue this around the head until you reach where you started.

The whole thing becomes a lot less messy when maintaining a good brushing routine - I use a soft toothbrush to get all the hair into its place. It's inevitable that the thread will catch on to some hair but the brush will easily pull it out again.

Do not cut the weft! Keeping it in once piece will lessen the chance of losing hair.
We will be spiraling upwards from here. The closer the rows, the fuller the wig. I like hair to be a bit thinner than most doll wigs are so I leave maybe like a 7mm gap at the back of the head? In the front I go with a bit of a narrower gap so the wig is less seethrough at the top.

The higher you go, the more you'll catch hairs into the stitches, so you'll want to ramp up the smoothing and brushing a bit to make it easier in the long run.

Work your way spiraling upwards until the weft runs out. Seal the end with a couple of stitches like in the beginning and grab a new long piece of hair.

This is how far I got with one piece on a ca 23cm circ head.

Keep going spiraling upwards.

Once all the way up, cut the leftover weft and seal the end. The main bulk of the work is done! Give it a good brushing.

The Crown Piece
This is where it gets a bit tricky. You'll want the crown to cover the last bit of the weft seams but also lay flat. I cut a piece of hair weft twice the length of how long I want the parting to be, folded it in half and stitched the fold so it stays in place.

I will then work the parting like in this wig video from Lomi's Playground. I use a pin to cross the hair sections from opposite sides to create a weave.

It is a little tricky at first but gets easier as you progress. My hand kept cramping when holding the weave, though - be mindful to take it easy and give your hands a break inbetween. If you gently put your work away, it won't unravel by itself, and you can easily pick it back up later.

Pat yourself on the back once all the way through.

Holding the weave together, stitch it to fix it into position on the underside.

I then use a flatiron to make it flat and fix the weave further into place. Be gentle and quick, though, not to risk melting your hard work. You can also use a clothes iron, but be very careful, be quick, and set it to the lowest possible temperature.


Give it a good brush after

Attaching the Parting
Turn the wig inside out to check for the direction - the meshy bit without elastic is where the forehead goes.

Attach thread on the wrong side of the wig and come out from the crown on the right side.

Place the parting in the correct direction (double check where the front of the wig is)

Catching to the underside of the parted crown piece and coming through the wigcap, stitch it in place. Be careful to sew in a way that the stitching doesn't show on top. The parted crown piece should overlap with the spiral sewn wefts a little for a seamless hair look.

There we go! Brush it well to cover anything that needs to be covered and the sewing bit is done.

Cutting and Styling
This is the result after sewing - sewing the wig up like this means that it can't just be a center parted hairdo and you'll have to cut a fringe of some sort.

First, wrap your dollfie in cling film so they don't get wet and covered in little bits of hair later.

The synthetic hair is kind of stiff just like this so to have it fall like normal hair, a boilwash is necessary. I put the wig on a DIY stand made of a bottle, boiled a kettle of water and poured it on top (obvicously, be careful not to burn yourself)

Use a towel to pat the excess water off and put the wig on your doll

Comb it well! Then determine if the wig cap is on correctly (aka the front is where the front should be) and section off hair you'd be cutting into the fringe

I usually start with a rough, longer cut just to mark where it goes.

I then clip it down to cut it layer by layer


At this point, I'd do another boil wash to make the fringe fall better. Pat dry again and use heat tools to give the hair some shape.


I was still not completely happy with the styling after those steps, so I put cling film over the slightly damp wig to really press it into place.


Finished Wig
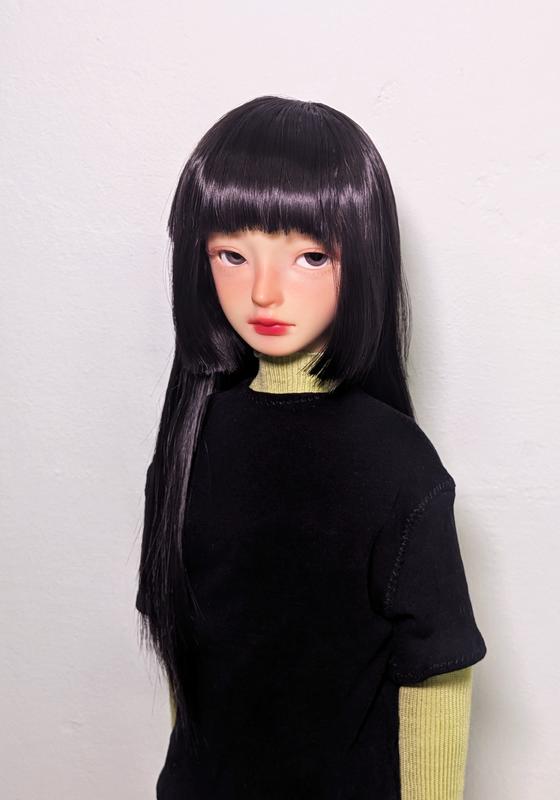
After ca 24h, the shape was much better.
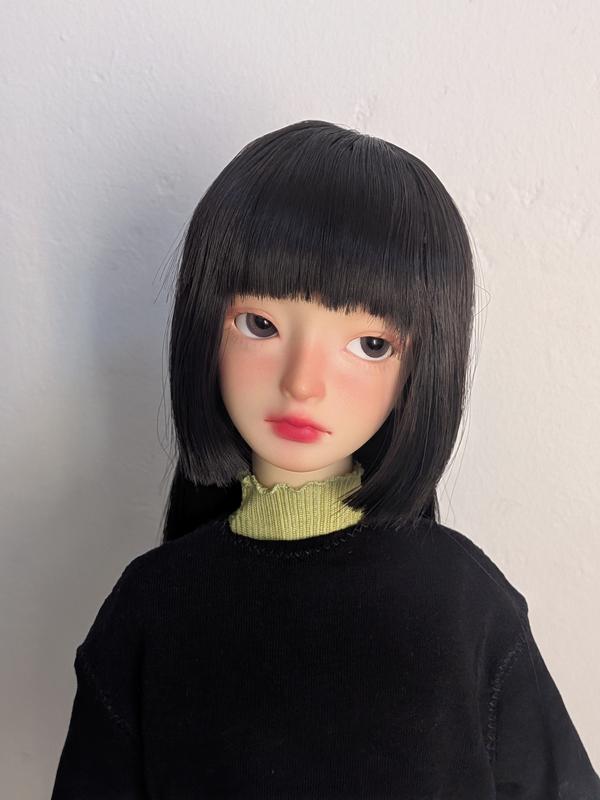
And here's a proper shot in good lighting. Good luck wigging!
Back to top